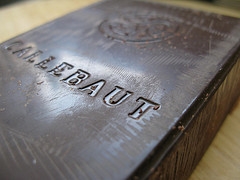
Showing posts with label Recipes. Show all posts

Wednesday, June 1, 2011

Chocolate salve

Callebaut chocolate


Friday was a rough day at work. Nothing spectacularly bad happened, just a lot of little annoying things that made me decide that I needed to bake something to feel better.


So, I decided to make Zingerman's Magic Brownies. These brownies are legendary in these parts. They are incredibly dense with just the right amount of cakeyness. Perfection.

The recipe turned out well, though I will probably use cake flour rather than all purpose flour next time. The texture seemed a tiny bit off (I could have also overmixed the batter). Definitely a keeper.


Zingerman's Magic Brownies 
from Midwest Living
 
6.5 oz butter (13 T)
6.5 oz unsweetened chocolate
1.5 C cake or all purpose flour
3/4 t baking powder
1/2 t salt
4 eggs
2 C sugar
1.25 t vanilla
1 C coarse chopped walnuts, toasted

1. Grease a 13x9x2 inch baking pan. Preheat oven to 325.

2. In a heavy small saucepan, heat the butter and chocolate over low heat, stirring, till chocolate is melted and smooth; set aside to cool.

3. In a small bowl sift together flour, baking powder and salt.

4. In a large mixing bowl, beat eggs and sugar with an electric mixer on high speed for 5 minutes or till light yellow and fluffy, scraping side of the bowl occasionally.

5. Add cooled chocolate mixture and vanilla. Beat on low speed until combined. Add flour mixture; beat on low speed until combined, scraping sides of bowl. Stir in walnuts.

6. Spread batter in pan. Bake 30 minutes or until brownies appear set. Cool in pan on wire rack; cut into bars.


I omitted the walnuts due to a food allergy (aka Black Magic Brownies). I'm sure that it's great with walnuts, too.

Wednesday, October 13, 2010

The verdict.....

So.....I didn't win the pickle contest, but it was really interesting. There were 37 entries which ranged from the standard cucumber to the exotic pickled tomato (that's a TON of pickles to taste!). First place went to the balsamic tomatoes.

The pickle contest in action at Downtown Home and Garden


In any event, I will be pickling more vegetables in the future. They make great snacks and refreshing side dishes for heavy meals. My recipe was actually an attempt to recreate the spicy pickles at Tartine Bakery that accompany the croque monsieur (one of my favorite sandwiches ever, especially with one of their lattes in a bowl). Sigh.


SPICY PICKLED CARROTS
1 cup white wine vinegar
2 cups water
1/4 cup sugar
2 bay leaves
6 sprigs fresh thyme
5 large cloves garlic, thinly sliced
1 1/2 teaspoons black peppercorns, cracked
1 1/2 teaspoons red pepper flakes (preferably marash)
1 1/2 teaspoons salt
1 1/2 lbs small carrots, or standard carrots cut down to sticks about 1/2 inch wide and 2-3 inches long
handful pearl onions
In a medium saucepan, combine white wine vinegar, water, sugar, thyme, garlic, black peppercorns, red pepper flakes, and salt. Bring to a boil over medium-high heat, then reduce to a simmer and cook, stirring occasionally, for 10 minutes. Remove the pan from the heat, and let cool for 5 minutes.

Put the carrots and pearl onions in a large, heatproof bowl, and pour the warm brine over them. Cool to room temperature.

While the carrots cool, make sure your canning jars are clean.

When the carrots and brine are cool, distribute the carrots evenly among the jars, arranging them snugly. Using a ladle, divide the brine evenly among the jars. The carrots should be completely covered by brine. Seal firmly and refrigerate for at least a week to three weeks depending on the thickness of the carrots, and how spicy you like it.

Friday, October 1, 2010

Recipe rundown: Roasted brussels sprouts

This week was a huge week for us. O passed his proposal defense and will officially be looking for a job. Woohoo! We are very excited about this next step in our lives. Where will it take us?


More on that later...for now, a recipe. I thought that I hated brussels sprouts for many years. When we received them in our CSA box a few years back, I decided to give them another chance (and was hooked). My favorite brussels sprouts recipe comes from Mario Batali, but this one is a close second. This recipe would be fantastic with chicken clay pot from Slanted Door


The addictive dressing


Yum.


ROASTED BRUSSELS SPROUTS
Adapted from David Chang


For brussels sprouts:
2 pounds Brussels sprouts, trimmed and halved lengthwise
3 tablespoons canola oil
2 tablespoons unsalted butter

For dressing:
1/4 cup Asian fish sauce (preferably Tiparos brand)
1/4 cup water
1/4 cup sugar
3 tablespoons finely chopped mint
2 tablespoons finely chopped cilantro stems
1 garlic clove, minced
1 (1 1/2-inch) fresh red Thai chile, thinly sliced crosswise, including seeds

Roast brussels sprouts:
Preheat oven to 450°F with rack in upper third.
Toss Brussels sprouts with oil, then arrange, cut sides down, in a 17- by 12-inch shallow baking pan. Roast, without turning, until outer leaves are tender and very dark brown, 35-40 minutes. Add butter and toss to coat.

Make dressing:
Stir together all dressing ingredients until sugar has dissolved.

Finish dish:
Put Brussels sprouts in a serving bowl, then toss with just enough dressing to coat. Serve remaining dressing on the side.


NOTE: The original recipe also calls for puffed rice topping, but I was lazy and did not make it. I think that it would add a nice crunch to the dish. I may have to try it next time!


Thursday, September 23, 2010

Raspberry shrub: Work in progress

Picking raspberries


The raspberry thief


Squish.

When we were in Portland over Labor Day weekend, I had some amazing blackberry drinking vinegar at Pok Pok. Inspired by the drink (some might say obsessed), I decided to give it a shot at home. 

Apparently drinking vinegars, also known as shrubs, were popular in the 1800s. Who knew? A shrub is essentially a fruit vinegar, and at Pok Pok it was mixed with sparkling water.

I convinced a friend that picking raspberries with babies would be a fun Sunday afternoon activity and so we headed to Makielski Berry Farm (Note: Raspberry bushes have thorns and thus may not be the best activity with one-year olds. Oops. Next time we'll try apple picking.).


After the fruit macerates in the vinegar for a week, you boil the concoction with sugar and strain out the solids. O. and I thought that the shrub was pretty good, but next time we'll use a more potent or a larger amount of vinegar. The shrub at Pok Pok definitely had more of a punch. Work in progress.


SHRUB
From the NYTimes
Makes about 1 1/2 to 2 quarts, depending on fruit used.
These measurements can be played with quite liberally, as some fruits contain more natural sugars.
2 quarts fruit, use any fruit, pears, figs, raspberries, cherries
1 liter apple-cider vinegar (preferably Bragg) or other vinegar.
1/2 to 1 cup raw sugar
Soda water
Ice
1. Rinse the fruit and discard any rot. Place in a large non-reactive or ceramic pot and mash for several minutes with your hands or a wooden spoon to break up. Pour in enough vinegar to cover and top with a lid. Let macerate at room temperature for a week, stirring once a day. (Do not be alarmed by the smell or the sludge on top.)
2. After a week, stir in 1/2 cup of the sugar and gently boil for 1 hour, stirring occasionally. Cool slightly, then strain. (The smell created from boiling is a bit offensive, so open the doors and windows.)
3. Make a test shrub: cool 3 to 4 tablespoons of the fruit mixture. Fill a 20-ounce glass with ice. Add water or soda water to almost the rim, then add the chilled fruit mixture. Taste to determine sweetness. If it is too tart, add sugar to the fruit mixture, little by little, while still hot. Cool fully and funnel into bottles. Will keep indefinitely in refrigerator.

NOTE: Next time I would try a different type of vinegar so that the shrub has more of a punch. They are not kidding about the smell. Open your windows or better yet, boil it on the grill. 


Monday, September 20, 2010

Recipe rundown: Maple-Roasted Butternut Squash


Fall is, without a doubt, my favorite season. I love the cool, crisp air, the colors, and the food. Many varieties of squash have started showing up at the farmer's market. What better way to enjoy it than with some Michigan maple syrup and pancetta? This recipe was fantastic and will definitely be making a regular appearance this fall (and beyond).


MAPLE-ROASTED BUTTERNUT SQUASH
Adapted from Barefoot Contessa Back to Basics by Ina Garten
  • 1 large or 2 small butternut squash
  • 1 head garlic separated but not peeled
  • 2 Tbsp. good olive oil
  • 2 1/2 Tbsp. pure maple syrup
  • 1 tsp. kosher salt
  • 1/2 tsp. freshly ground black pepper
  • 2 ounces thinly sliced pancetta, chopped
  • 16 whole fresh sage leaves
  • French bread for serving
Directions
Preheat oven to 400°. Peel and seed butternut squash and then cut into 3/4- to 1-inch cubes. Place squash and whole unpeeled garlic cloves in a baking dish or sheet pan large enough to hold them all in one layer. Toss with olive oil, maple syrup, salt, and pepper, and bake for 20 to 30 minutes, until squash begins to brown, turning once during baking. Sprinkle pancetta and sage leaves evenly over squash and continue to bake for another 20 to 30 minutes, until squash and garlic are tender and caramelized. Season to taste and serve hot with French bread for guests to spread with the roasted garlic.

Monday, August 16, 2010

Recipe rundown: Chocolate Chip Scones


This is what dinner looks like when it's too hot to cook.


I am happy to report that I am making progress on my list, though admittedly, there are a lot of things in progress (like the succulents waiting to be potted). It's a start. And though it has been crazy hot here, I have even managed to stick to my bake-once-a-week pledge.

Last week I tried Karen DeMasco's chocolate chip scones from
The Craft of Baking. They were delicious. It was the first recipe that I have tried from the cookbook, and I really liked the way that it was written (and the ideas for variations). I am definitely looking forward to trying more of the recipes in the future.


The good stuff: Calder Dairy cream and Callebaut chocolate


Mixing it up


Oops. There were supposed to be twelve scones.

CHOCOLATE CHIP SCONES
Adapted from The Craft of Baking by Karen DeMasco


1 3/4 cups flour
1 tbsp plus 1 tsp baking powder
1/4 cup plus 2 tbsp granulated sugar
1/2 tsp kosher salt
6 tbsp unsalted butter, cut into small pieces
1/2 heaping cup semisweet chocolate chips
1 cup plus 2 tbsp heavy cream
1 tbsp Demerara sugar
In the bowl of an electric mixer fitted with the paddle attachment,combine the flour, baking powder, granulated sugar, and salt. Put the bowl in the freezer for 5 minutes, then beat the mixture on low speed until the butter is broken up into pebble sized pieces, about 3 minutes.
Add the chocolate chips. With the mixture on low speed, add 1 cup of cream and mix until the dough just comes together. Using your hands, knead the mixture in the bowl to bring the dough completely together.
Turn out the dough onto a lightly floured surface and roll it into a 7-inch round, about 3/4 inch thick. Cut the dough into 12 wedges.
Place the pieces on a baking sheet, spacing them 1/2 inch apart. Cover with plastic wrap and freeze for 15 minutes (or place in the refrigerator for 1 hour).
While the scones are chilling, preheat the oven to 375 degrees F.
Brush the scones with the remaining 2 tablespoons of cream and sprinkle lightly with the Demerara sugar. Bake the scones, rotating once, until they are golden on the edges and are firm to the touch, about 20 minutes. Transfer to a wire rack to cool.

Tuesday, July 20, 2010

Birthday recipe rundown: Chocolate pots de crème


Whew. Lately there has been too much illness in my house, my friends. Thankfully, nothing has been serious, just disruptive.

My parents came to visit for my birthday, which was a lovely treat. We spent some time at the Matthaei Botanical Gardens, where L. practiced standing up on anything and everything. We also went to Top of the Park and lounged around on a blanket listening to good music. Altogether a very relaxing visit.


The very cool monkey puzzle tree (photo by O.)


Hanging with Dad


On my actual birthday, we went out for sushi and L. hammed it up with the wait staff and chowed down on sushi rice. O. made me celebratory chocolate pots de crème from the Tartine cookbook. They were extremely decadent and super delicious.


So now that my birthday has come and gone, I am working diligently on my list. It has actually been a nice opportunity to reflect on the types of things that make me happy and how to incorporate said things into (or in some cases, back into) my life. More to come. But for now.....the recipe!

CHOCOLATE POTS DE CRÈME
From Tartine by Elisabeth Prueitt and
Chad Robertson

6 oz bittersweet chocolate, coarsely chopped
2 3/4 cups heavy cream
3 tbsp sugar
pinch salt
8 large egg yolks
Unsweetened softly whipped cream for serving


Preheat oven to 350˚F. Have ready 8 custard cups or ramekins that hold ¾ cup each. Choose a baking pan or baking dish for a water bath large enough to accommodate custard cups or ramekins without touching, and deep enough to hold water that will reach three-fourths of the way up the sides of the molds once they are added. Pour enough water into the pan to reach about halfway up the sides of the pan, and place the pan in the oven while it is heating.

Pour water to a depth of about 2 inches into a saucepan, place over medium heat, and bring to a gentle simmer. Select a heat-proof bowl that will rest securely in the rim of the pan over, not touching, the water. Put the chocolate in the bowl, place over the water, and heat, stirring occasionally, until the chocolate melts and is smooth. Remove from the heat.

Meanwhile, in a small saucepan, combine the cream, sugar, and salt, place over medium heat, and heat to just under a boil. Place the egg yolks in a mixing bowl and whisk until well blended. When the cream mixture is ready, remove it from the heat and slowly pour it into the melted chocolate, whisking to incorporate. Slowly add the chocolate-cream mixture to the egg yolks, again whisking well to incorporate. Pour through a fine-mesh sieve into a pitcher or large measuring cup. You should have about 1 quart.

Line up the custard cups or ramekins on the countertop, and pour the mixture into them, dividing it evenly. Pull out the oven rack holding the water bath and place the molds in the bath. Pour in more water if necessary to reach three-fourths of the way up the sides of the molds.

Bake for 20 to 25 minutes. To test for doneness, jiggle one of the molds; the center of the custard should still be a bit wobbly, but the outside should appear set. Remove the water bath from the oven, and remove the custards from the water bath. Let cool. The custards will continue to cook and set up as they cool. Serve warm or cold with whipped cream.

Note: The whipped cream was delicious, but I actually preferred mine sprinkled with some smoked sea salt to bring out the deep chocolate flavor. I think that these would also be fabulous with lavender or lemongrass (steeped in the cream mixture).

Tuesday, July 6, 2010

Recipe rundown: Almond cake


This may be my new, go-to cake. It was really easy, delicious, and is the type of cake that you could serve at any time of day. I found it on David Lebovitz's blog. David adapted the recipe from Chez Panisse Desserts, and I made one small change (due to the typical weight of almond paste in the US). I made it for a dinner party at a friend's house and served it with Santa Rosa plums, white nectarines, and black raspberries.


I think that it might have been even better the next day.


ALMOND CAKE
Adapted from David Lebovitz


1 1/3 cups (265g) sugar
7 ounces (198g) almond paste
3/4, plus 1/4 cup (140g total) flour
1 cup (8 ounces, 225g) unsalted butter, at room temperature, cubed
1 1/2 teaspoons baking powder
3/4 teaspoon salt
1 teaspoon vanilla extract
1 teaspoon almond extract
6 large eggs, at room temperature


1. Preheat the oven to 325ºF (162ºC). Grease a 9- or 10-inch (23-25 cm) cake or springform pan with butter, dust it with flour and tap out any excess. Line the bottom of the pan with a round of parchment paper.

2. In the bowl of a food processor, grind the sugar, almond paste, and 1/4 cup (35g) of flour until the almond paste is finely ground and the mixture resembles sand.

3. In a small bowl, whisk together the remaining 3/4 cup (105g) of flour, baking powder, and salt.

4. Once the almond paste is completely broken up, add the cubes of butter and the vanilla and almond extracts, then process until the batter is very smooth and fluffy.

5. Add the eggs one at a time, processing a bit before the next addition. (You may wish to open the machine and scrape the sides down to make sure the eggs are getting fully incorporated.)

After you add all the eggs, the mixture may look curdled. Don't worry; it'll come back together after the next step.

6. Add half the flour mixture and pulse the machine a few times, then add the rest, pulsing the machine until the drying ingredients are just incorporated, but do not overmix. (You can also transfer the batter to a bowl and mix the dry ingredients in, which ensures the dry ingredients get incorporated evenly and you don't over beat it.)

7. Scrape the batter into the prepared cake pan and bake the cake for 65 minutes, or until the top is deep brown and feels set when you press in the center.

8. Remove the cake from the oven and run a sharp or serrated knife around the perimeter, loosening the cake from the sides of the pan. Let the cake cool completely in the pan.

Once cool, tap the cake out of the pan, remove the parchment paper, and set on a cake plate until ready to serve. (Tip: Warm the bottom of the cake pan directly on the stovetop for just a few seconds, which will help the cake release.)

Storage: This cake will keep for four days at room temperature, well-wrapped. It can also be frozen for up to two months.


Tuesday, June 29, 2010

Recipe rundown: Asparagus and Pecorino Salad

So I tried the salad. The vinaigrette was bright and fresh, and I really liked the shaved asparagus. I could not find lemon marmalade so I substituted lemon zest. I assume that it would be a tiny bit sweeter with the marmalade.


Asparagus and Pecorino Salad


The recipe makes a lot of extra vinaigrette which I may use for the following recipe. Come on, summer corn!


FREGULA WITH FRESH SUMMER CORN
Via Mario Batali

Kosher salt
½ pound (about 1 1/3 cups) fregula
1 tablespoon extra virgin olive oil
1 cup fresh corn kernels
Maldon or other flaky sea salt
¼ cup thinly sliced scallions
2 tablespoons Lemon Vinaigrette
Coarsely ground black pepper
Serves 6

Bring 4 quarts of water to a boil in a large pot and add 2 tablespoons kosher salt. Add the fregula and cook until al dente, 10 to 12 minutes. Drain well.

Meanwhile, heat a large cast-iron or other heavy skillet over high heat until smoking hot. Add the olive oil and heat until very hot, then add the corn and cook, stirring once or twice, until the kernels are charred in spots, about 2 minutes (Watch out for popping corn kernels). Season with Maldon salt and cook, stirring, until just tender, another minute or so. Transfer to a large bowl and allow to cool.

Add the fregula and scallions to the corn, then add the vinaigrette and toss well. Season generously with Maldon salt and with pepper. Serve, or let stand at room temperature for 1 hour to bring out the flavors. (The fregula can be refrigerated overnight; let come to room temperature before serving.)

Monday, June 28, 2010

Sidelined

Sorry for the absence; L. has been a little under the weather with an ear infection and teething for the past few days (which meant lots of hugs and downtime).

Just gums.


Our dear friend Jen came for a visit at the end of the week. It was wonderful to see her. Jen and I always end up having the big picture, what-should-you-do-with-your-life types of discussions, which is always refreshing. This visit was no exception. In the past, these discussions have primarily centered on our careers. And while the next steps in our respective careers is still an important component of the discussion, this time the conversation turned to the importance of making time for the little (or not so little) things that you'd like to do in life.

Inspired by Joslyn of Simple Lovely we decided that we would each make a list of 35 simple, meaningful things that we'd like to do before we turn 36. We even gave ourselves a deadline for creating the list- August 1st. Roast a chicken will definitely be on my list. Thomas Keller's recipe sounds simple and delicious.

But...Jen also shared her plans for her fortieth birthday (which involves a villa in France). So I am also planning on drafting a list of 5 larger things that I'd like to do before I am 40. Things that require a bit more planning than roasting a chicken. Things like a celebration of my fortieth birthday in a distant locale. Where should I celebrate?

Thursday, June 17, 2010

Recipe rundown: Warm Lentil Salad

The finished product.

I love to cook, but spending a lot of time making dinner (or baking) has been a challenge in the past nine months. My goal is to try one new recipe each week.

Tonight we made
a Ladurée inspired warm lentil salad with fried eggs. It was delicious. O. and I decided that the only thing missing was a glass of Chardonnay. Next time.

Oh, and L. liked the lentils (before he started playing with them).


Now if I could only have these macarons for dessert. Sigh.


FRIED EGGS OVER WARM LENTIL SALAD WITH LARDONS
via Gourmet


3/4 cup French green lentils (du Puy)

6 oz thick-cut bacon, cut crosswise into 1/4-inch-thick strips
2 leeks (white and pale green parts only), finely chopped
2 celery ribs, finely chopped
1 large carrot, finely chopped
2 tablespoons red-wine vinegar, or to taste
1 tablespoon finely chopped fresh tarragon
1 tablespoon olive oil
8 large eggs

1 cup baby spinach

Cover lentils with cold water by 2 inches in a saucepan, then simmer, uncovered, until just tender, about 20 minutes.

While lentils are simmering, cook bacon in a 12-inch nonstick skillet over moderate heat, stirring, until crisp, then transfer with a slotted spoon to paper towels to drain, leaving fat in skillet. Add leeks, celery, and carrot to skillet and cook, stirring, until just tender. Add vinegar and boil until most of liquid is evaporated. Remove skillet from heat and stir in tarragon, half of bacon, and salt and pepper to taste. Transfer to a bowl and keep warm, covered, reserving skillet.

Drain lentils well in a large sieve. Stir into vegetable mixture and season with salt and pepper. Keep warm, covered.

Wipe skillet with paper towels, then add oil and heat over moderate heat until hot but not smoking. Fry eggs in batches until whites are just set but yolks are still runny and season with salt and pepper.

Divide lentil salad among 4 plates. Top with spinach, eggs, and remaining bacon.

Wednesday, June 16, 2010

On the list

This salad sounds delicious. Maybe I can find some fresh asparagus at the farmer's market this weekend.


I love these yellow stone earrings from J. Crew. So pretty.


Spotted ages ago on Simple Lovely.

These wedges have been on my list for awhile.


When we were at the Art Institute of Chicago a couple of weeks ago, we made a wrong turn and ended up in a gallery which featured artwork from picture books. This is where we were introduced to the fabulous book, Jeremy Draws a Monster by Peter McCarty. We definitely need to pick it up for L.

He is starting to find books amusing. The bath and exercise scenes in The Going to Bed Book bring on the giggles. Exercising before bed (and post-bath) is pretty hilarious.